This post is the third of a three parts series of articles about manage development and CI/CD workflow with jgit-flow and Pipeline
- Part-1: Tools and Planning
- Part-2: Git workflow with JGit-Flow
- Part-3: Development and delivery process with Jenkins Pipeline
Part 3: Development and delivery process with Jenkins Pipeline
The Pipeline plugin, allows users to implement a project’s entire build/test/deploy pipeline in a Jenkinsfile and stores that alongside their code.
Before we’ll begin writing the Jenkinsfile, keep in mind that there are many ways to implement a CI/CD process. The flow we’ll discuss and implement is just one approach. Moreover, there are usually multiple ways of writing a command in the Jenkinsfile: Native Groovy (Pipeline plugin DSL is groovy based), use a shell script, a Pipeline script code, external libraries, etc..
Multibranch Pipeline
In a Multibranch Pipeline project, Jenkins automatically discovers, manages and executes Pipelines for branches which contain a Jenkinsfile in source control (It is possible to write a Pipeline script directly in the job configuration though). It enables an implementation of different Jenkinsfiles for different branches. However, here we’re going to implement a single Jenkinsfile for multiple branches.
Configuration
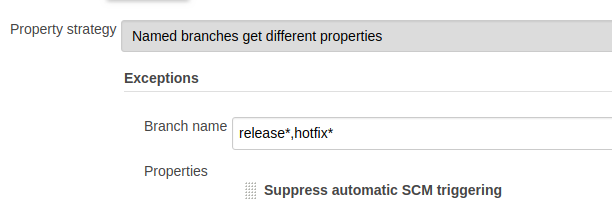
The entire definition of the Pipeline would be written in the Jenkinsfile, except the following: In the ‘Branch Source’ we’ll declare the source control and repository that we’ll work with (this can also be done with code). In addition, we’ll set the branch discovery strategy to “All Branches”, meaning the job would start for every modification of the repository (i.e. for every push).
Then we’ll exclude the release and ‘hotfix’ branches (this will be explained later).

Writing the Jenkinsfile, step-by-step
Context
The Pipeline job should be run on a dedicated Jenkins slave, ‘server CICD’, hence the script would be written inside a node context:
node('Server CICD') { }
Checkout
This step checkouts code from source control. Scm is a special variable which instructs the checkout step to clone the specific revision which triggers this Pipeline run.
stage('Checkout') {
   checkout([
           $class           : 'GitSCM',
           branches         : scm.branches,
           extensions       : scm.extensions + [[$class: 'LocalBranch', localBranch: '']],
           userRemoteConfigs: scm.userRemoteConfigs
   ])
}
Build
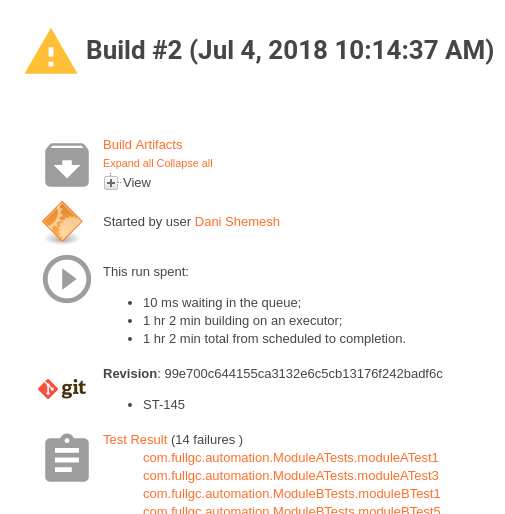
a. Maven build: We are using the maven build tool, and trigger a maven build with a shell command. We like to get a detailed report from Pipeline on a failure, including failed tests, links to them, and statistics. Moreover, we like the job status to become automatically ‘unstable’ if there were failed tests. These are provided by the Pipeline Maven plugin, which wraps the maven build command.
withMaven(jdk: 'JDK 8 update 66', maven: 'Maven 3.0.5') {
           sh "mvn -Dmaven.test.failure.ignore=true clean install"
}

b. Handle build exceptions and test failures: On maven build failure:
If Pipeline checked out a feature branch (triggered by a push to a branch which starts with ‘ST-‘ ), a notification email should be sent to the feature owner only. We’ll use the Mailer plugin for that.
Otherwise, we like an email notification to be sent to all server members, and a notification to the slack channel as well (Slack plugin). This should include a list of the last Git commits with the committer name, so that we can get an idea of what code modification broke the build.
If an exception has been thrown during the build, we like to:
-
Catch it
-
Change the build status to ‘failure’
-
Send the appropriate notifications
-
Throw the exception
The final script for the build looks like this:
String branch = env.BRANCH_NAME.toString()
stage('Maven build') {

    //returns a set of git revisions with the name of the committer
   @NonCPS
   def commitList = {
       def changes = ""
       currentBuild.changeSets.each { set ->
           set.each { entry ->
               changes += "${entry.commitId} - ${entry.msg} \n by ${entry.author.fullName}\n"
           }
       }
       return changes
   }

   def handleFailures = {
       if (branch.startsWith("ST-")) {
           step([$class: 'Mailer', notifyEveryUnstableBuild: true, recipients: emailextrecipients([[$class: 'RequesterRecipientProvider']]), sendToIndividuals: true])
       } else {
           step('Send notification') {
               mail(to: 'server@fullgc.com',
                       subject: "Maven build failed for branch: " + env.BRANCH_NAME.toString(),
                       body: "last commits are: " + commitList().toString() + " (<$BUILD_URL/console|Job>)");
           }
           slackSend channel: 'server', color: 'warning', message: "Maven build failed for branch ${branch} \". \nlast Commits are: \n" + commitList().toString() + "\n (<$BUILD_URL/console|Job>)"
       }
   }

   try {
       withMaven(jdk: 'JDK 8 update 66', maven: 'Maven 3.0.5') {
           sh "mvn -Dmaven.test.failure.ignore=true clean install"
       }
       if (currentBuild.result("UNSTABLE")) {
           handleFailures()
       }
   } catch (Exception e) {
       manager.buildFailure()
       handleFailures()
       throw e
   }
}
Release process
 In this process, we’ll upload a tar (the maven build output) to s3, where the environment depends on the git branch we’re working on. The code would be placed in the ‘process’ step:
a. Release tar name. The release file is a tar file (the maven build output). Its name should represent the release version. The release version is found in the root pom.xml file, and we’ll extract it from there
b. Release candidate tar name. This is somewhat tricky. On release/hotfix only, we like to create a release candidate for QA. The release candidate holds the name:
<volcano version>RC-<RC number>
In our story, the first release candidate would be: ‘volcano-1.2.0-RC-1’(‘volcano-1.2.1-RC-1’ in the case of a hotfix).
The RC number starts with 1. If a QA person found a bug, we’d need to fix it, and then increment the RC number, i.e. ‘volcano-1.2.0-RC-2’ and so on.
We’ll use a text file with the current RC number to know what the next version should be for release. We then update the file, commit changes and create a new tart with the correct name.
def pom = readFile 'pom.xml'
def project = new XmlSlurper().parseText(pom)
String version = project.version.toString()
String tarName = "volcano-${version}-release-pack.tar.gz"

stage('Release'){

@NonCPS
def newVersion = {
   def doesFileExist = fileExists 'releases.txt'
   if (doesFileExist) {
       echo "file releases.txt exists"
       def file = readFile 'releases.txt'
       String fileContents = file.toString()
       Integer newTarVersion = fileContents.toInteger() + 1
       writeFile file: 'releases.txt', text: newTarVersion.toString()
       echo "new tar version is: " + newTarVersion
   } else {
       echo "file releases.txt does not exist"
       writeFile file: 'releases.txt', text: "1"
   }
   readFile 'releases.txt'
}

if (branch.startsWith("release") || branch.startsWith("hotfix")) {
   String tarRCVersion = newVersion()
   newTarName = "volcano${version}-RC-${tarRCVersion}-release-pack.tar.gz"
   sh "mv ./volcano/target/${tarName} ./viper/target/${newTarName}"
   tarName = newTarName
}

step('Commit and push releases file') {
   sh "git remote set-url origin git@bitbucket.org:fullgc/volcano.git"
   sh "git add -A"
   sh "git commit -m 'update volcano version to '${tarRCVersion}"
   sh "git push"
}
Note that we did exclude the release/hotfix branches. This allows a couple of team members to work on the branch when QA has made a rejection or there is a bug to fix, without the new version being released with every push.
Upload tar to s3
We won’t implement the deployment process with the Pipeline script, and leave it for the deployment tool, ‘Chef’ for the sake of this illustration. Chef will deploy a new volcano app, with the appropriate version in s3. This would require amazon s3 credentials. For the upload itself, there is a pipeline script. Nevertheless, we’ll implement it here using Amazon CLI commands, using the shell.
step('Upload tar to s3 cli') {
   withCredentials([[$class: 'AmazonWebServicesCredentialsBinding', credentialsId: 'xxxxxxxx-xxxx-xxxx-xxxx-xxxxxxxxxxxx', accessKeyVariable: 'AWS_ACCESS_KEY_ID', secretKeyVariable: 'AWS_SECRET_ACCESS_KEY']]) {
       sh "pip install --user awscli"
       sh "sudo apt-get -y install awscli"
       sh "aws s3 cp ./volcano/target/${tarName} s3://fullgc/tars/"
   }
}
Deployment process
We won’t be diving too deeply into how Chef performs a deployment, but suffice to say this: In order for Chef to know that there is a new ‘volcano’ version it needs to deploy, the version in the environment (qa or development or production) file needs to be updated to the new version.
a. First, we’ll check out the Chef repository and ‘cd’ in the environments directory which the environment files rely on.
b. Replace the current version of the appropriate environment for the new version. This can be done by shell tools like jq. Here we’ll use Groovy.
c. Commit and push changes
d. Send a slack notification
e. If the branch is develop or master, it removes the releases.txt file
if (!branch.startsWith('ST-')){
  stage('Deploy') {

  def incrementVersion = {
     def environment = {
     switch(branch) {
         case 'develop': 'development.json'
             break
         case 'master': 'production.json'
             break
         default: 'qa.json'
     }
  }
   def environmentFileContent = readFile environment
   def environmentJson = new groovy.json.JsonSlurper().parseText(environmentFileContent)
   environmentJson.default_attributes.volcano.version = "volcano-${version}"
   String environmentPrettyJsonString = new groovy.json.JsonBuilder(environmentJson).toPrettyString()
   environmentJson = null
   writeFile file: $environment, text: environmentPrettyJsonString

  sh "git commit -am 'Changed volcano version in $environment env to '${version}"
  sh "git push"
}

checkout changelog: false, poll: false, scm: [$class: 'GitSCM', browser: [$class: 'BitbucketWeb', repoUrl: 'https://bitbucket.org/fullgc/chef'], doGenerateSubmoduleConfigurations: false, extensions: [[$class: 'LocalBranch', localBranch:
  '**']], submoduleCfg: [], userRemoteConfigs: [[url: 'git@bitbucket.org:fullgc/chef']]]
   dir('environments/') {
       incrementVersion()
   }
slackSend channel: 'server', color: 'good', message: " New volcano version ${version} is being deployed to $environment"
  }
if (branch == 'develop' || branch == 'master') sh "rm releases.txt"
}
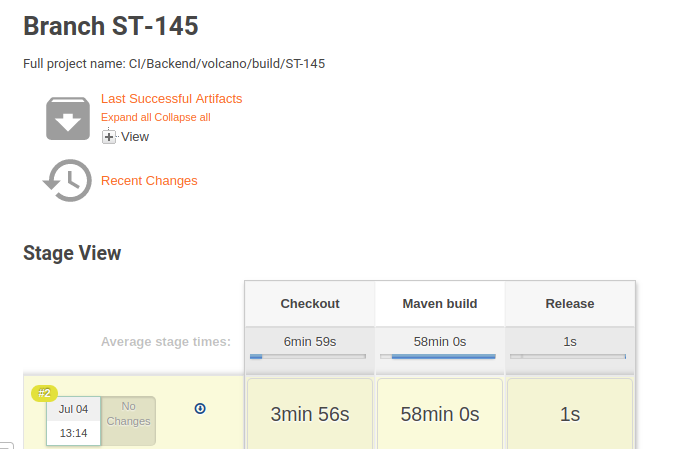
In the image below an example of a Pipeline run:

Tips
-
To save a lot of time, use the Pipeline Syntax for every pipeline command
-
While working on the Jenkinsfile, you don’t have to commit and push every modification just to test an execution. You can use run an execution using ‘replay’ until everything works.
-
Jenkins Blue Ocean plugin provides a new awesome user experience, check it out.
-
Pipeline is still new, but you shouldn’t get too frustrated by weird errors you may get while writing the script, most of them are common and the solution can be easily found on the web.
-
The Pipeline Unit Testing Framework allows you to unit test Pipelines before running them in full.
Wrapping up
Pipeline as a code is pretty much a game changer, in the sense that it is now in the hands of every programmer, allowing them to write a full release (and deployment) process, that can fit the development workflow easily.
The complete code can be found in my GitHub.